I can't disagree more about the MPC/AMT "Alien kit." MightyMax says that it's an "accurate sculpt" of the original first-movie creature. It is not. It's a TERRIBLE sculpt. The actual "big chap" of the first movie is tall, slender, lanky. Please take a close look at the link I provided, above, to the one "picture rich" page I was able to find re: this kit. It has short limbs, a barrel chest, and the head is shaped entirely wrong. It's like an Ewok version of the Alien. And besides that, the pose is about as "lifeless" as I've ever seen.
He's very right about the extra work which goes into vinyl kits, but to do a styrene kit, there's also a lot of extra work which goes into it.
For a vinyl kit, they basically pour hot vinyl into a cool mold, then tip the mold back over to drain out the molten vinyl. The result is that a "skin" of vinyl forms on the inside surface of the mold.
The vinyl is still very soft at that point, and the entire "pour" is pulled out of the mold. If the skin is sufficiently solidified before this is done, it will spring back into the shape from the mold. If not, the part may need to be heated and "reshaped" slightly by the builder later on.
It is then hung and usually dipped in a cooling bath in order to allow it to properly "solidify." It's then dropped into a baggie, which goes into a box.
To do a vinyl kit, the first step is to trim away the excess vinyl around the "pour opening." This is easy if done right, but challenging if done wrong. The trick to doing this is to have a big pot of nearly boiling water (i use a big pot, literally on top of the stove, to do this). You dip the "pour opening" into the water, let it heat up, and then, using a sharp knife, carefully trim away the excess material. If you don't heat the material, trimming this is fairly difficult and can make a mess, as your blade may tend to "wander" in the fully-solid material. If the material is nice and hot, it's like cutting a tender bit of ham, though!
Once trimmed, the majority of your work is done, but you'll want to test-fit the parts. If they're not fully properly shaped, the fit may not be perfect. Trying to glue these together this way is very, very difficult. The trick, again, is heat. Heat up both mating parts, as described above, and then put them together. Since they'll both be soft, the parts should conform to each other very easily. Put the mated parts under cool water for a few moments, and they'll "lock" into the right shape. If done properly, in a well-designed kit (like the Geometric "Star Trek" kits from above, for example) where the seams are at "real seams" in the figure, you won't even need putty. But if you do, the amount of putty work required will be very, very minimal.
If you DO use putty, realize that the same techniques you usually use on a styrene kit won't necessarily work. Specifically, sanding vinyl is a fairly bad idea. I usually apply a
'thinned" putty, with a dental tool, and wipe with a solvent-damp rag or cloth. The trick is to never need to sand away excess. This may take one or two application cycles. as the first cycle in particular may not fully fill the seam using this technique, but it works very nicely.
The trick with styrene kits is that the parts cannot ever truly match the detail of the original sculpt, due to the nature of the "rigid part in a rigid tool" molding process. Every part must be made by injecting a solid plastic into a solid mold, then pulling the two apart. This means that the features in the part must have "draft" (that is, all features in the molded part must have a positive "slant" relative to the plane in which the part pulls away from the tool). Otherwise, you could never remove the molded part from the tool! You'll usually not notice draft issues on well-designed "mechanical" kits, but on a figure kit, you will notice it. Look at any part sprue, and realist that the sprue itself represents the "parting plane. You can never have any "undercut" on any part... nor any true 90-degree-from-parting-line surfaces, for that matter. EVERYTHING is 3 degrees, or more, off from vertical (as seen from the parting plane). This becomes particularly noticeable on "organic" subject matters.
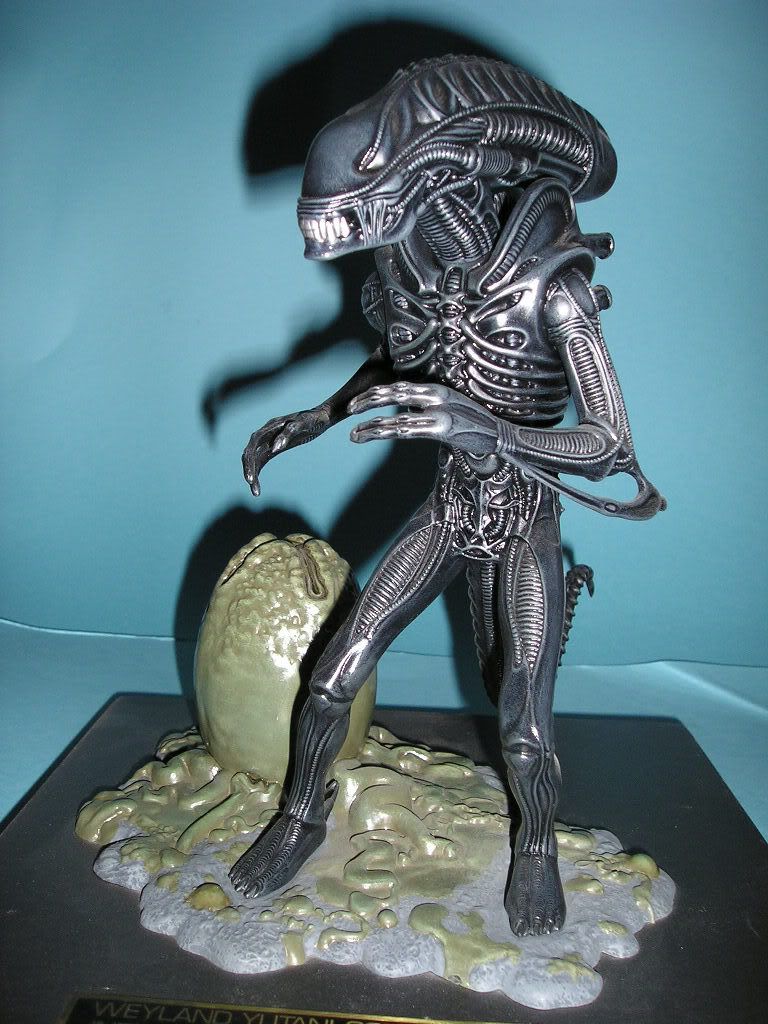
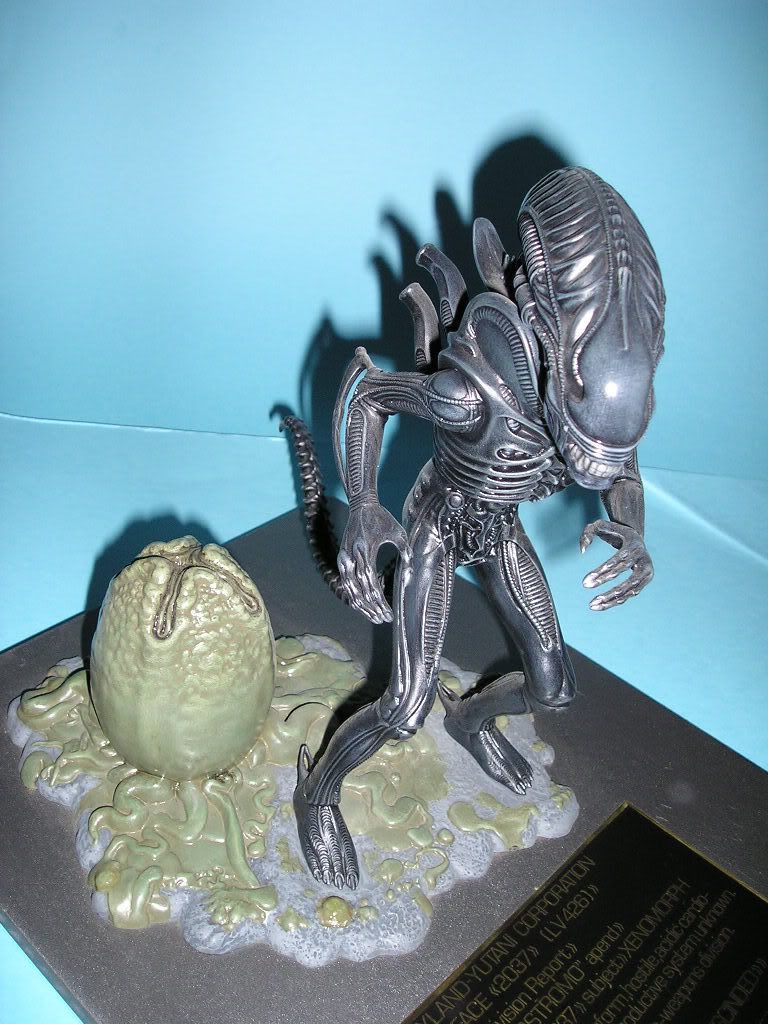
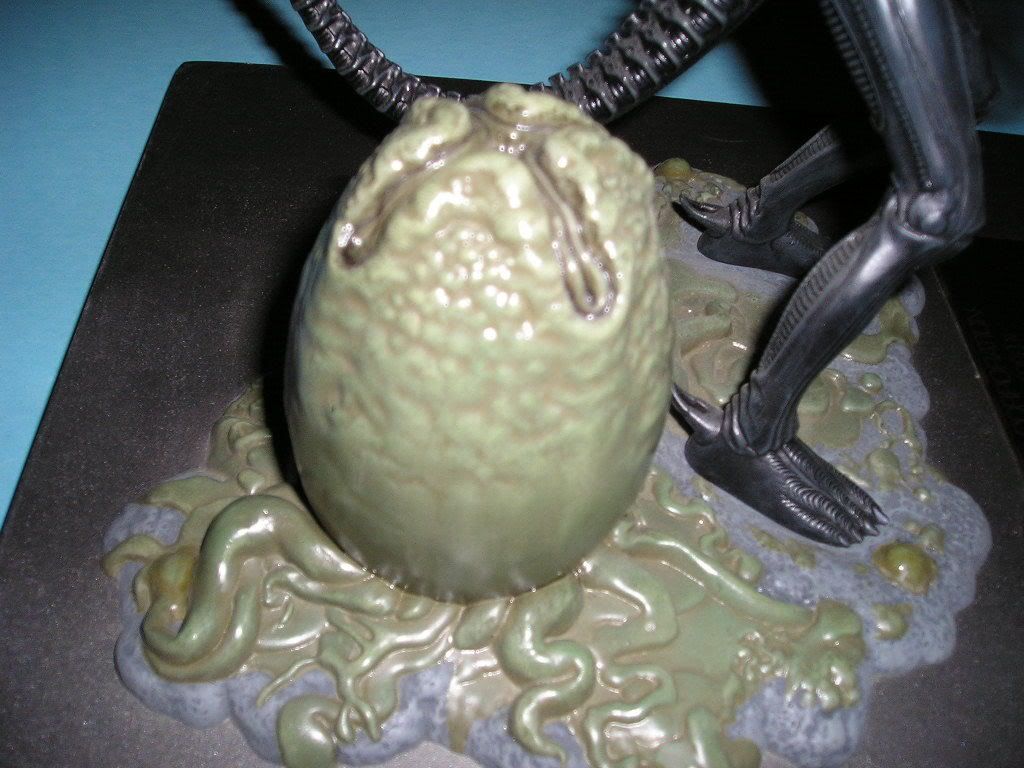
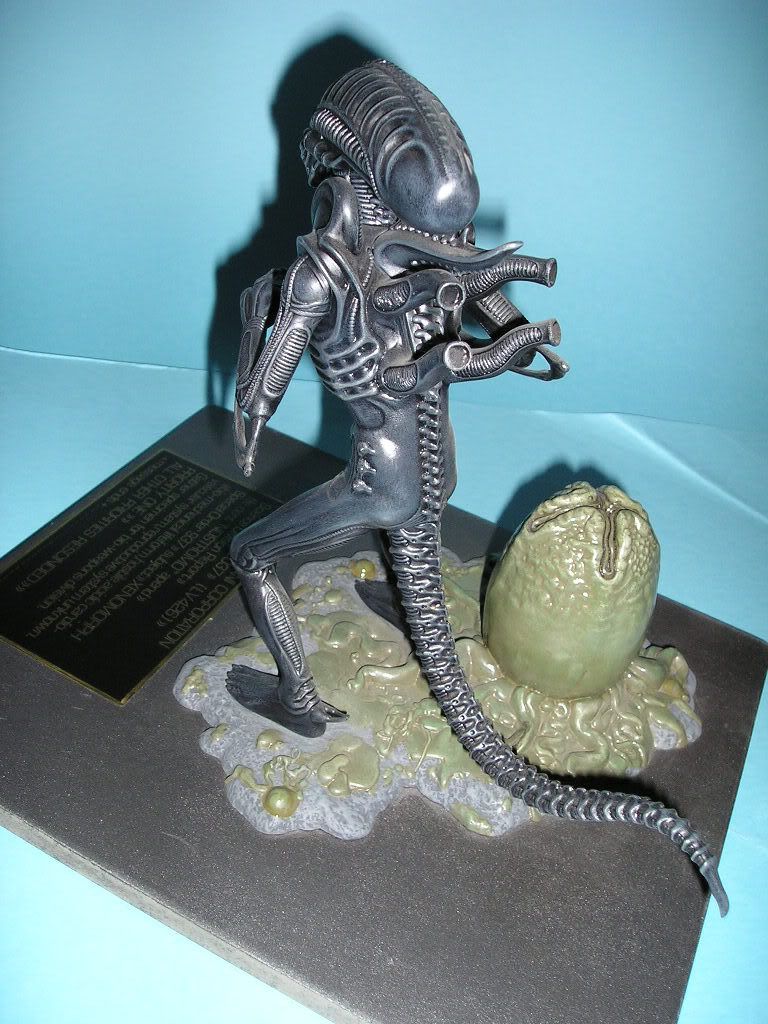
The Halcyon creature shown above is one of the better examples of working around this which you're likely to find... it's a really nice kit. But if you look carefully at the details in the arms, legs, etc... in the egg... and so forth, you can see that there are some areas which have soft, angled detail where the detail should be hard and clean. These are the places which they had to compromise on in order to be able to eject the part trees out of the mold.
So, molded "organics" have that issue... and they also have the issue of being pretty limited in terms of positioning. There are only a handful of arrangements of limbs, head, etc, which can effectively be molded in a two-part-separating tool. Halcyon did a very nice job on this figure, but the pose is a lot less... "dynamic"... than you're likely to find in a resin or, better still, vinyl figure.
Resin kits are done by using a flexible mold and rigid part. This allows the maker to create "undercut" areas which are identical to a sculpted pattern. But resin parts have a very long "cycle time" to make.... especially compared to injection-molded parts, which can be less than ten seconds per cycle, and are seldom more than thirty seconds, even for a very complex part, or vinyl parts, which are typically quite a bit less than a minute.
A resin part, ideally, should be left "in mold" for at least an hour (it depends a lot on what casting resin you're using, of course) before demolding. You can't achieve quick cycle times with cast parts. So... low production volume and high detail reproduction make "resin kits" the standard for the "garage kit" market.
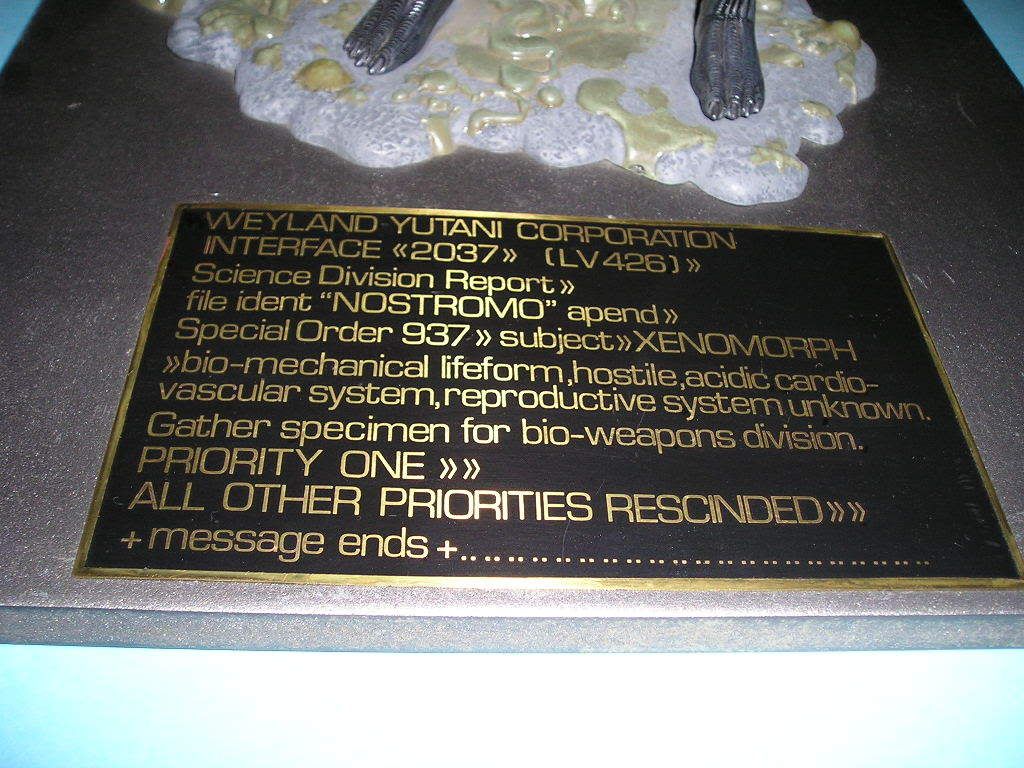
Vinyl is something that either "garage kit" or "mass production" makers can use, but vinyl allows reproduction of more complex shapes in a single piece (likely why they used this on the Nostromo, which has all variety of surface details which, if done in styrene, would have needed to hav ebeen separate parts. The kit, which has a relatively small number of parts, would have then ended up having hundreds of parts to get the same level of detail! The problem with this is that the kit, detailed as it is, needs careful work to ensure that, say, the flat surfaces on the hull are truly FLAT... and that the kit stays in proper shape, long-term. as vinyl kit parts, especially if they become warm (say, due to sunlight, or just an overly warm house?) will tend to sag over time if not reinforced.
The trick to doing this sort of work is merely to recognize the advantages, and shortcomings, of each material. Pick the right material for the job. And accept that each material will also involve compromises.
The compromise, in terms of styrene figure kits, involve the lack of ability to handle anything but positive "draft angles" in a molded part, and the limitation of poses this brings about. It's possible to get around this, only by chopping the figure up tiny sub-elements... meaning it'll have a MASSIVE part count, and will likely require massive amounts of putty work.
I have a styrene "Joker" which looks pretty nice... but is broken down into a huge number of pieces. And I can still see the artifacts of molding. I also have a vinyl one, which is larger, and is is a perfect replica of the original sculpt. I far prefer the latter, because it has no "compromises" involved.
So... don't be scared of other materials besides injection-molded styrene.
And... do your research before buying a kit. I did buy the MPC figure (or rather, the AMT re-pop). The sculpt is terrible, and is utterly inaccurate to the subject matter... unless you're into those little "bobble head-ish, super-deformed" figures, I suppose.
There's not a lot of love for this kit out on the web, but I did find someone who did
a particularly nice build-up of this kit. Check it out, in combination with the link I showed you earlier, and decide for yourself if you're willing to accept the shape issues with this kit.
In particular, the head is way too short, the neck flares in a way the real creature didn't, the body is wide and thick, and the limbs are almost stubby. Go look up some production images of the real "big chap" from the first film, which this is intended to represent, and you'll see that this kit take individual bits from that figure, but puts them together in the wrong proportion and wrong relationship. It seems that the sculptor had access to a series of close-ups, but none of the full creature?


")